Last updated on July 20th, 2022 at 08:05 am
Choosing just the right ad server for your website can be a tough decision to make. The choice of ad server can make or break the deal for publishers in terms of website monetization. Not all ad servers can meet the monetization goals of every website. However, all publishers want an ad server that has a user-friendly interface, provides solutions for both guaranteed and non-guaranteed inventories, and offers fast ad loads. DoubleClick for Publishers ( DFP) is one such one-stop-shop ad server that also lets publishers maximize revenue from AdSense ads. There are a number of impressive features in DFP and new publishers can find it a little hard to wrap their heads around all the features of DFP. We, at Blognife, are here to help them get accustomed to the most popular ad server in the world.
Publishergrowth: The Revenue Acceleration Platform for Publishers
Blognife is elated to announce the launch of Publisher Growth- a community of publishers that helps you actively accelerate your revenue. This platform assists publishers in growing their traffic and revenue. As publishers, you can share and read reviews of ad networks and hosting companies. You can connect with other publishers to build links for growth and monetization hacks and more. This platform will help you stay up to date with the advertising and publisher ecosystem.

Features:
In this tutorial, we are going to learn how to generate passback tags in DFP. A passback tag is an ad tag that is trafficked through a third-party ad server and not placed directly on the page. This happens when a tag is passed back to the DFP to find an ad to serve, as the third-party ad network could not find an ad that meets the selection criteria or one that meets the minimum CPM that was previously agreed upon. In such cases, a house ad is displayed from the publisher’s own DFP network.
How to Generate Passback Tags in DFP?
Step-1
Publishers can go about the first step in two ways.
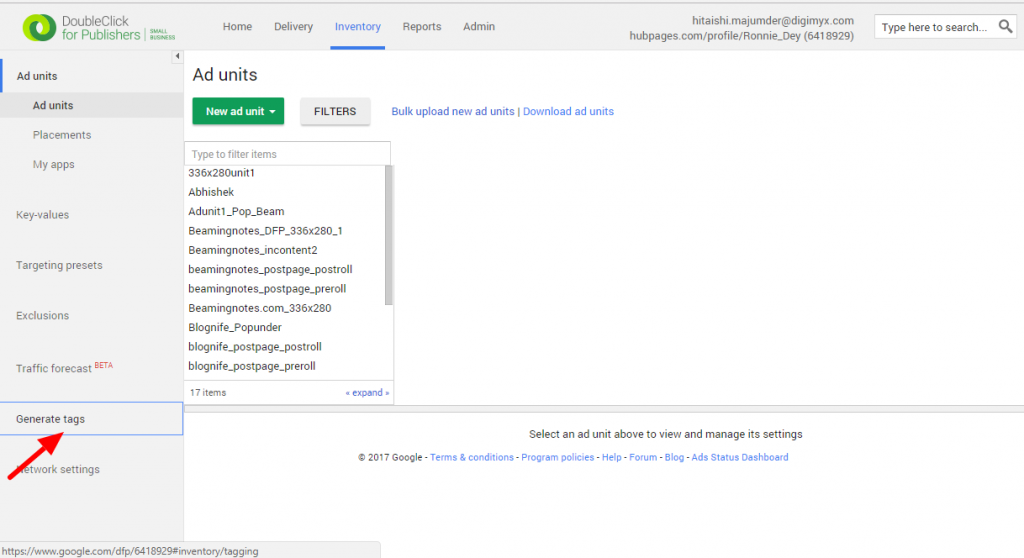
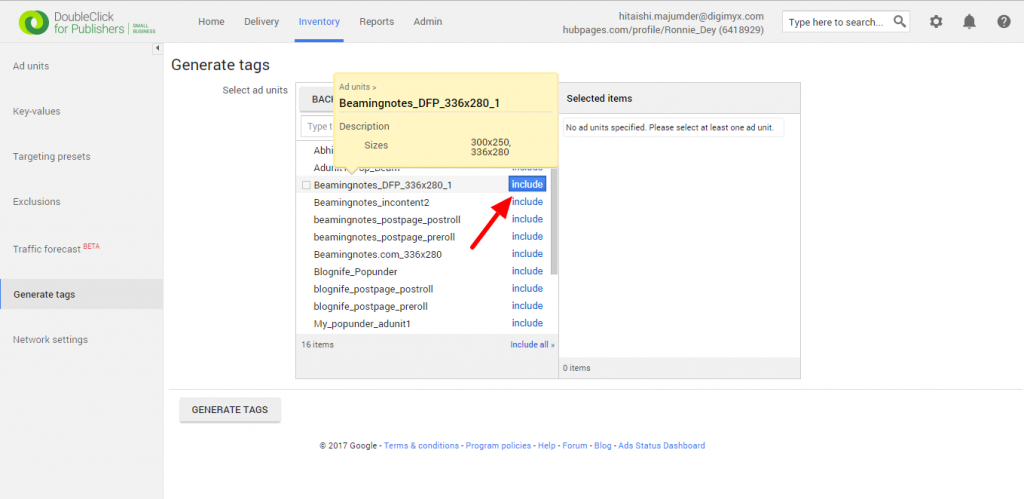
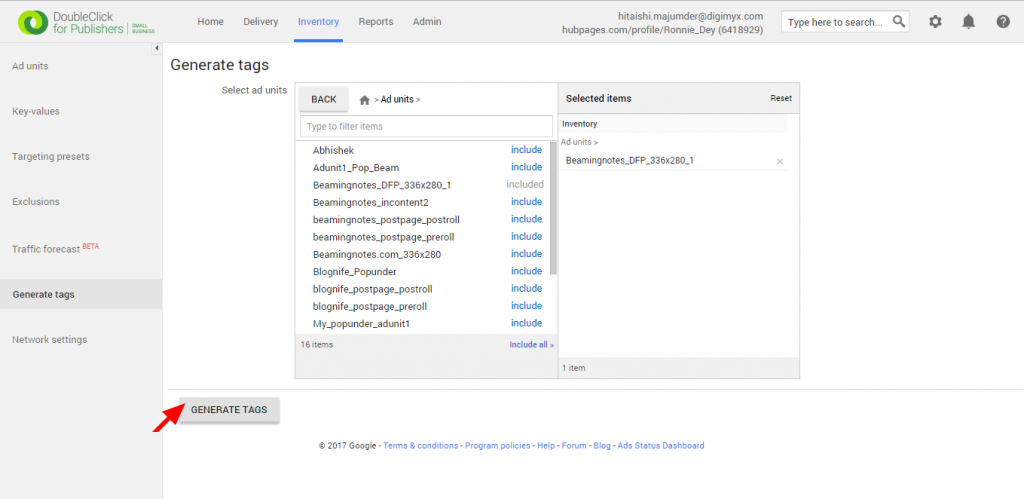
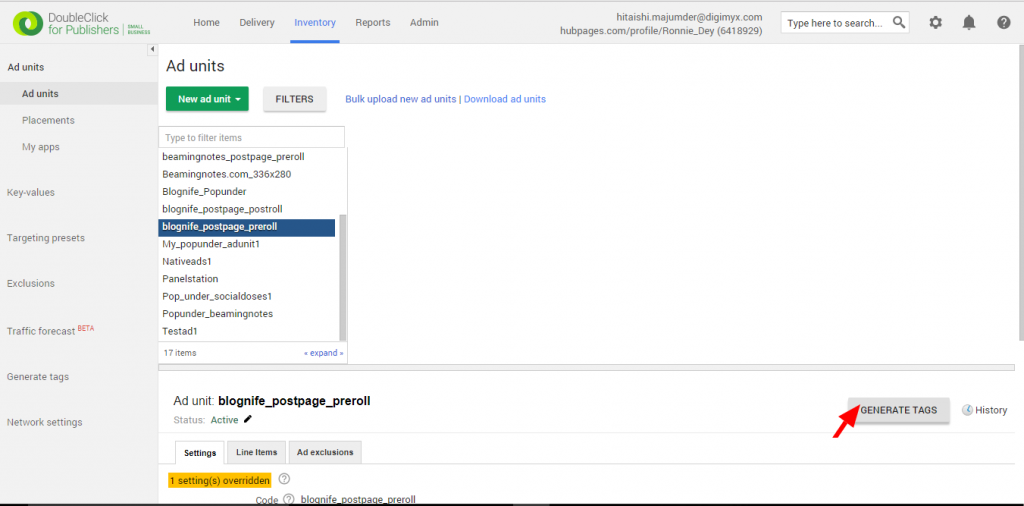
(a) First login to your DFP account, go to the Inventory tab and after the ad units get loaded, click on the Generate tags tab on the left. Then choose the ad unit for which you want to generate ad tags by clicking on include and now click on the Generate tags tab below.
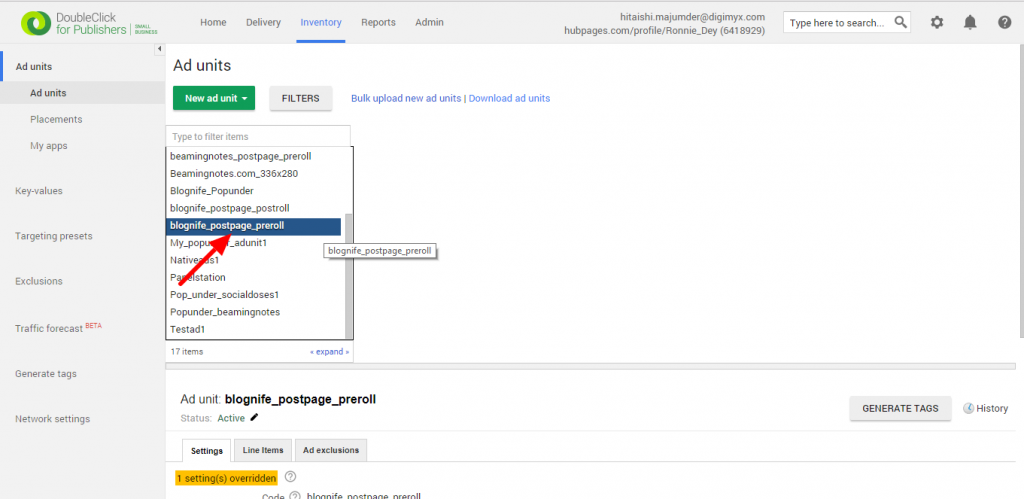
(b) Instead of following step (a), first, click on the ad unit for which you want to generate the ad tags. Then click on the Generate tags tab on the bottom right corner.
Step-2
Now you have to select the tag type. Select the Google Publisher Tag and click on continue.
Step-3
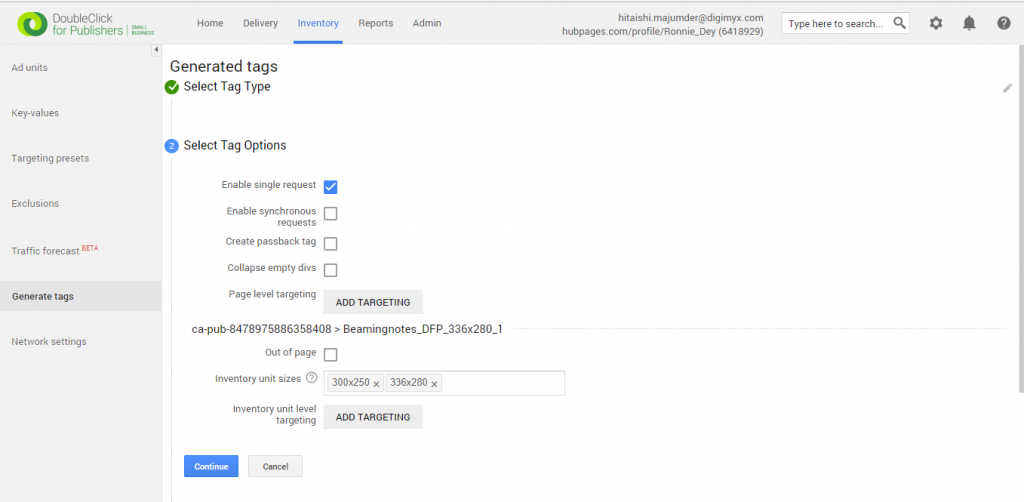
Now the publisher has to select the tag options. Keep in mind that the Enable single request option is enabled out of default and the rest are disabled out of default. Once you have checked the Create passback tag option, click on continue.
Step-4
The tag results, containing the Javascript source code for the ad unit selected, are now displayed. The Javascript code will include the ad name and also the placement sizes that will serve the particular tag. The tag is now ready to implement. You can copy the passback tag and implement it wherever needed.
Thus a passback tag can be generated in DFP without any hassle. DFP is crucial for publishers, especially for those who make a majority of their earnings from display ads. So, it is important for publishers to have a proper understanding of DFP. We hope this tutorial has been helpful and will enable publishers to seamlessly generate passback tags.
Our Recommended Tools for Publishers:
- Best AdSense Alternative- Setupad, Ezoic
- Push Notification Network- iZooto, Unative,
- Best Contextual Ad Network- Media.net (Extra 10% for 3 months)
- Native Ad Network- Mgid
- Popup Ad Network- Exoclick, Propeller Ads
- Best Web Hosting- Bluehost, Hostgator, Stablehost, WPEngine
- Blogging Tools- OptinMonster, Astra, Teachable,

I and my team research various ad networks and can help you increase your overall ad revenue; so you could rake in more greenbacks with the best monetization platforms. Tap into the power of the online publishing business with me. I am just a mail away, so reach out to me if you want to scale up your website revenue. mail: [email protected]
